Sunday, August 28, 2011
Going full frame
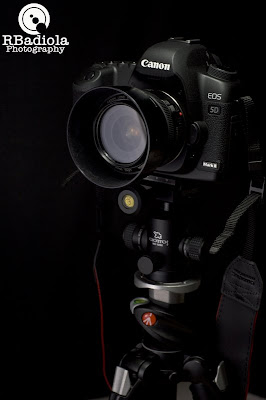
I've been wanting a full frame body for quite a while now and I couldn't resist the urge to get one...and I finally did. A package arrived on wednesday containing the handsome camera body that I ordered online. It's finally here! My Canon 5D MK2!
I'm not really wowed by opening the package because I use the same camera at work. So it really is not new to me. Though I'm so excited that I finally own one! I know that it has been long overdue that I have one...hahahaha.
I really don't have to review the features of it here in my blog as the reviews about this camera is everywhere. So I'll just emphasize on the key features I love about this little beast.
The thing that really sold me to this body is the sensor size. I know I'm the type of person that usually says that nice photos are a product of the photographer and not the camera itself but being a photographer who has seen tons of images shot from different types of cameras, I can conclude that if you usually look at your images at 100% the images taken from a full frame camera is superior to the ones taken with cameras with smaller sensor sizes. The comparison is even more visible if you look at images taken from a medium or a large format camera. Well, basically the principle is that the larger the sensor size is, the more it takes light in and it gives you more detail per pixel.
Having said that, having a full frame camera does not really make you a better photographer. You still have to apply the basic principles of photography. But a highly capable body in the hands of a very good photographer is the perfect combination to getting superb shots.
The 5D MK2 has the ability to use ISO 50 via the extended iso menu. ISO 50 is very useful for studio shots as it allows you to use a shallow depth of field for your aperture. Very useful if you are using around 3 or 4 lights that will otherwise overexpose your image if you're at ISO 100. So you don't have to use an nd filter in the studio.
It basically has the same bells and whistles as my older 50D such as the metal body, pc port for studio flashes, micro lens adjustment etc. The burst speed though is slower than my 50D. My 50D is fast...and I mean fast! Very useful for photographing birds in flight and sports and anything that moves fast. That is the downside to it. Though I'll still trade that for a bigger sensor. THE BIGGER SENSOR IS WHAT MATTERS MOST.
I know that anytime soon that Canon is going to release a MK3 version of the 5d. Though it really doesn't bother me. The MK2 has all the features that I have wanted in a body.
Sunday, August 21, 2011
Go get that tablet!!!
I got into retouching photos in the late 90's. Never did I realize how big Adobe Photoshop will be in the next decade as I have started this career in Corel photopaint. In the early 2000's I was able to score my very first own copy of Photoshop. A Photoshop 5 LE version. It was enough to let me learn this trade. I was never aware that this will be my career in the next couple of years.
At work, I saw people using the old Wacom tablets and I thought they looked pretty cool. You even looked cooler using it. So I though maybe I'll give it a try and so I did. Being so used to the mouse, I never really became an instant fan of it. So after a couple of hours of using it I gave up, and returned to my trusty old mouse.
I then attended a Photoshop seminar last year and it was Scott Kelby himself who was giving the lecture. At the beginning of the seminar he emphasized over and over again the difference of using a mouse and a pen in photo retouching. He mentioned how cool it looks like when you're using one...hahaha. Although he also said other key advantages of using one over the mouse.
So during the break, I went out and started looking at the stuff they were selling outside the conference rooms. One thing that caught my eye was this guy doing a demo for the Wacom Cintiq tablet monitor. The guy was doing these brush strokes effortlessly. I was amazed so I decided to try it out again. So I bought a Wacom Bamboo.
The Wacom Bamboo trained me to use the pen. Also it trained my hand to be more precise in using it. Till I got an Intuos4 at work that I realized that I needed to replace my Bamboo at home to the more professional version. So I did.
I got a medium Wacom Intuos4 wireless from ebay for $200. Yes...$200 brand new...try to beat that! As these tablets don't go lower than $330 in ebay. I got pretty lucky so I grabbed it. A week later I got it and it still feels amazing to use after a couple of weeks.
The biggest things I loved about the tablet is the pressure sensitivity and the shortcut buttons. The sensitivity is double than what it was with the intuos3 I suppose. The shortcut buttons are really easy to configure and it also shows the functions that are assigned to the buttons via an illuminated display which makes the tablet look more elegant. Setup was pretty easy. I just charged the battery, turned my bluetooth on in my imac and I was ready to go. If you keep it plugged with the usb cord it becomes the wired version. Though the real wired version has a slightly bigger active work area than the wireless one, I can barely notice the difference. It comes with a couple of tips, from soft to hard, the pen rest, USB cable, the grip pen, manual, and the installer. If you register the software in the Wacom site, they give you a free software download...though I haven't really downloaded anything yet. The wireless one DOES NOT come with a mouse. That's the thing that's missing from the wireless package. Although like me, if you get so used to using the pen, you'll probably use it for everything and not need a mouse at all.
With the pen I can do brush strokes more naturally. This is perfect when applying masks in photoshop by brush. The pen tool also feels more accurate with the pen. The thing that I like the most with the pen is when I use the healing brush and the clone tool, if you use Photoshop a lot you'll know what I'm talking about. Also I noticed that after hours of using the pen that my hand feels better than with using a mouse for a long time.
So if you're still using the mouse for retouching photos, give the pen a try. It takes a while to get used to but when you do...you'll never go back to the mouse.
Sunday, August 14, 2011
Getting into HDR
HDR is a form of photography wherein you take a couple of exposures then merge them together into a single file to obtain a variety of tones and colors that you cannot get with a single exposure. Basically what happens is that it allows you to get a high dynamic range from your lightest and darkest tones in you image...thus the name High Dynamic Range.
Usually when you shoot without a graduated neutral density filter, either your skies are going to be blown out, or your foreground will be too dark if you are trying to get the best exposure, unless the scenery has perfect lighting like in the late afternoon or early in the morning. Trying to get the perfect exposure sometimes is a give and take process. You can only have so much perfect exposure in your image that sometimes you'd have to sacrifice blowing out some highlights, or ending up clipping some shadow parts. Both of these are a photographers nightmare due to the fact that once it's overblown or clipped, data in that part of the image is lost and sometimes unrecoverable.
Modern software like Photoshop and Lightroom have the option to recover data in parts that are overblown or clipped...but it does not work all the time, even if it does, sometimes it doesn't look natural. So sometimes in situations where lighting is uneven for scenery shots, a lot of photographers resort to HDR. I do, and I love it. Sometimes people do say it's cheating on the photographers part...in my opinion, a photographer puts in time to compose, shoot and edit shots in HDR, just like in any other types of shots so I don't see it as cheating. As we all know, around 97% of the media that we see in print, tv, web, etc. has been retouched or manipulated...the percentage could probably be greater than that. So I don't really see it as cheating, it's just a different way of processing images to get the result that you want. Enough said.
Most if not all modern digital cameras have the ability to automatically bracket and shoot in burst. In doing HDR shots, you need to bracket...which means you have to take more than 1 exposure for a scene, which means you take 1 shot that is the mid exposure for the scene then one overexposed shot and one underexposed. The degree of overexposure and underexposure should be at least a 1 stop difference from your reference shot (your middle exposure). I have learned that more than 1 stop gives you more range of tone when you process it. I usually did just one stop before, now I usually do 2. I was in a photoshop expo this year and I've learned that for Canon users, it's ideal to get 3 bracketed exposures, and for Nikon users it's 5. I'm not really sure if that's true. I'm a Canon user so I just do 3.
The easiest way to do it is to set your cameras AEB or Auto Exposure Bracketing to bracket 3 shots. As I have said, I use a 2 stop difference for each bracket. Then set your camera to aperture priority. This will allow you to just set your aperture and the camera will do the rest. For scenery shots I do an aperture of f9 or greater. Then set your camera to timer (if you don't have a shutter release)...it is also helpful if your camera is set on a tripod. Remember, do not press the shutter with your own finger without setting it to timer mode, as this will move the camera a bit, which will cause blur. When you press the shutter and the timer counts down to zero, your camera should take the 3 exposures that you bracketed. It is ideal that you shoot in RAW mode.
Next is to upload the bracketed shots in your computer. For HDR shots I use Photomatix pro. This software is really easy to use to process HDR images. I just open the software, click on Generate HDR then just drag the 3 bracketed images in the window. After the software aligns the 3 files, all you have to do is control the sliders for the settings that you wish. Then process the image as a single tonemapped file. It is really a no brainer. Go crazy with it as you wish. Though I have to warn you...HDR photography is really addicting.
The best thing to do is to experiment. Try using more exposures, bracket your shots differently...whatever will make it different.
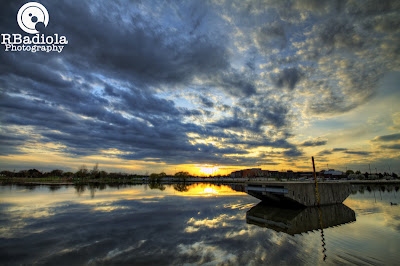
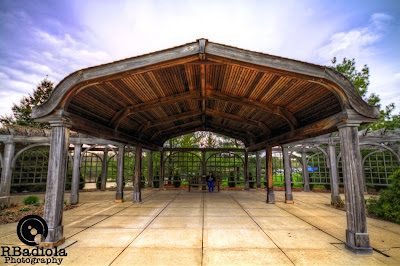
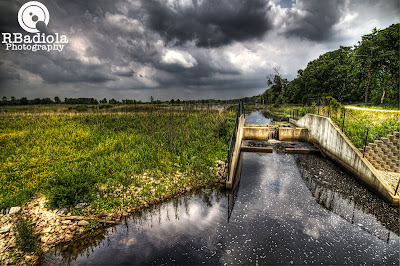
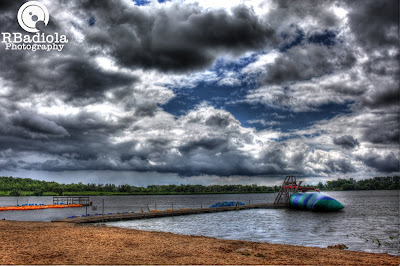
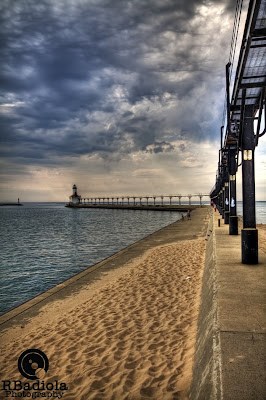
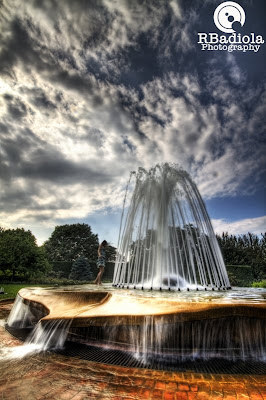
Here are some of my HDR shots from the past:
Shot at dusk...the sunset was perfect!
The colors in this shot in real life was boring. HDR just brought them to life!
HDR is perfect with reflections!
Clouds become more dramatic with HDR
HDR shot with a wide angle lens is the perfect combination
Slow speed shots for water works in HDR too!
Usually when you shoot without a graduated neutral density filter, either your skies are going to be blown out, or your foreground will be too dark if you are trying to get the best exposure, unless the scenery has perfect lighting like in the late afternoon or early in the morning. Trying to get the perfect exposure sometimes is a give and take process. You can only have so much perfect exposure in your image that sometimes you'd have to sacrifice blowing out some highlights, or ending up clipping some shadow parts. Both of these are a photographers nightmare due to the fact that once it's overblown or clipped, data in that part of the image is lost and sometimes unrecoverable.
Modern software like Photoshop and Lightroom have the option to recover data in parts that are overblown or clipped...but it does not work all the time, even if it does, sometimes it doesn't look natural. So sometimes in situations where lighting is uneven for scenery shots, a lot of photographers resort to HDR. I do, and I love it. Sometimes people do say it's cheating on the photographers part...in my opinion, a photographer puts in time to compose, shoot and edit shots in HDR, just like in any other types of shots so I don't see it as cheating. As we all know, around 97% of the media that we see in print, tv, web, etc. has been retouched or manipulated...the percentage could probably be greater than that. So I don't really see it as cheating, it's just a different way of processing images to get the result that you want. Enough said.
Most if not all modern digital cameras have the ability to automatically bracket and shoot in burst. In doing HDR shots, you need to bracket...which means you have to take more than 1 exposure for a scene, which means you take 1 shot that is the mid exposure for the scene then one overexposed shot and one underexposed. The degree of overexposure and underexposure should be at least a 1 stop difference from your reference shot (your middle exposure). I have learned that more than 1 stop gives you more range of tone when you process it. I usually did just one stop before, now I usually do 2. I was in a photoshop expo this year and I've learned that for Canon users, it's ideal to get 3 bracketed exposures, and for Nikon users it's 5. I'm not really sure if that's true. I'm a Canon user so I just do 3.
The easiest way to do it is to set your cameras AEB or Auto Exposure Bracketing to bracket 3 shots. As I have said, I use a 2 stop difference for each bracket. Then set your camera to aperture priority. This will allow you to just set your aperture and the camera will do the rest. For scenery shots I do an aperture of f9 or greater. Then set your camera to timer (if you don't have a shutter release)...it is also helpful if your camera is set on a tripod. Remember, do not press the shutter with your own finger without setting it to timer mode, as this will move the camera a bit, which will cause blur. When you press the shutter and the timer counts down to zero, your camera should take the 3 exposures that you bracketed. It is ideal that you shoot in RAW mode.
Next is to upload the bracketed shots in your computer. For HDR shots I use Photomatix pro. This software is really easy to use to process HDR images. I just open the software, click on Generate HDR then just drag the 3 bracketed images in the window. After the software aligns the 3 files, all you have to do is control the sliders for the settings that you wish. Then process the image as a single tonemapped file. It is really a no brainer. Go crazy with it as you wish. Though I have to warn you...HDR photography is really addicting.
The best thing to do is to experiment. Try using more exposures, bracket your shots differently...whatever will make it different.
Here are some of my HDR shots from the past:
Monday, August 8, 2011
Taking shots of my toys
I am an avid collector of robot toys...especially ones from the 80's. Growing up, I've been fascinated with Astroboy, the Transformers, Macross, Voltron, Voltes V...and a lot more. Around 15 years ago I got fascinated by the Gundam series...so I have those too. Although nowadays I rarely do build Gundam models because of all the time I dedicate to photography, which has taken about 1/3 of my life right now.
Anyway, couple of days ago I won an auction for a pair of Bandai Macross' joke machines. These toys are really rare. I had one when I was a kid and it gave me such a reminiscence when I won one at an auction years ago. Now I had a chance to own a pair of them so I did bid on them and I won. So I got it last week and I prepped the studio for of course...a photoshoot! Here's what I got:
For toy shots like these I like to use my 70mm macro lens and my camera set on a tripod. I use around 3 lights and a colored paper background. Basically the jpeg conversions of these photos don't give the actual shot any justice at all. However it works for the site. The complete series can be found here.
Wednesday, August 3, 2011
Canon MR-14EX Macro Ring Light
The ringlight is one of the most necessary equipment for macro photography. It basically lets you pump out light in places that are really difficult to light up. It also allows light into places where light would otherwise be blocked off by your lens or your lens hood. The biggest advantage of using the ringlight is it allows you to use a narrow depth of field by closing the aperture of your lens...you need the extra depth of field when taking macro shots due to the fact that a millimeter makes or breaks a shot when you are so close to your subject.
I started out with a cheap sub $100 ringlight I bought online. I thought it would be enough for what I need. It was actually ok for the first couple of weeks...till you realize that it fails a little bit too much! It's really critical when you hand hold your camera set your focus and take the shot for the flash to actually work. I would say 3 out of 5 times, the cheap ringlight will fail. It flashes, though the sync with the flash and the shutter seems to be off.
So I decided to invest in a genuine Canon ringlight. It is really expensive but I decided to get it because I'll be using it all the time anyway. So I bid on one online and won! It arrived a week later.
I got a Canon MR-14EX Macro Ring usually around $500, which I've heard is pretty good, I got mine used so it's way cheaper than $500. I just cannot afford to spend $600-$700 for the MT-24, so I got it's little brother. I was impressed with the build quality, as is with other Canon products. Before I forget, this ringlight needs a lens adapter if you are not using Canon macro lenses such as me. I heard it fits the Canon 100mm macro both the L and the regular one, as well as the 50mm and the 60mm macro without the adapters, correct me if I'm wrong. Mine came with a 62mm adapter for my 70mm Sigma lens, so I am good to go.
So I took photos of flowers inside our house and I was glad the flash does not fail on me, not even once. I love that recharging sound that is not present in the newer Canon flashes. The things that I like about it were:
Very reliable. I've had it for months now and it never has failed on me, not even once.
There's a modeling light, so you can compose in total darkness.
Flawless trigger for an extra 430ex or a 580ex.
High speed sync also available.
Snaps on really easily. Unlike the cheaper ones that you have to screw it in the lens.
Build is pretty good.
I've heard that there's a button you can press on your camera that you can press to activate the modeling light. I've tried doing this but I cannot seem to make it work. This will eliminate the trouble of looking away from the viewfinder to switch it back on when it shuts off.
For macro shooting, you cannot go wrong with this one. Although it's a bit pricey, I suggest it's really worth it.
Subscribe to:
Posts (Atom)