Today I managed to test out my Sigma 10-20mm f4-5.6 ex hsm. I'm loving it so far!
Here are a couple of points that I can say about it:
Build quality is pretty good. It's the usual Sigma EX build with the matted finish.
The focus ring and the zoom ring are not bad either, it feels tight and it won't change positions accidentally.
It includes the hood and a bag.
Features an HSM motor for quick focusing...full time manual override also supported.
Image quality is pretty decent. Corners are a bit soft...UWA lenses are notorious for that anyway.
Basically, you need to post process every shot to eliminate dark corners. Lightroom can do that automatically.
Center is pretty sharp, even wide open.
Chromatic aberrations are pretty minimal. The amount is negligible.
Even using an ordinary uv filter (the thick ones) won't cause vignetting.
All in all a pretty solid performer here!
In a couple of months I'll post more sample shots here.
Wednesday, December 29, 2010
Saturday, December 25, 2010
The sigma 10-20mm f4-5.6 ex hsm
Monday, December 13, 2010
Our gingerbread house
So my girlfriend created this awesome gingerbread house...and of course I had to take shots of it.
I set it up on a pink background and took shots. I was using my 70mm macro at f14 with a 200/sec shutter speed at ISO 100.
After I took the shot I post processed it and applied a dreamy effect on it. Worked fine!
I set it up on a pink background and took shots. I was using my 70mm macro at f14 with a 200/sec shutter speed at ISO 100.
After I took the shot I post processed it and applied a dreamy effect on it. Worked fine!
Sunday, December 5, 2010
The white background
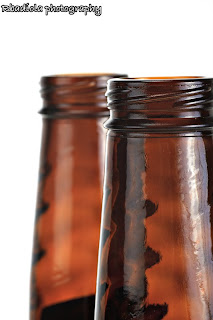
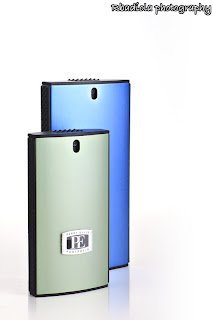
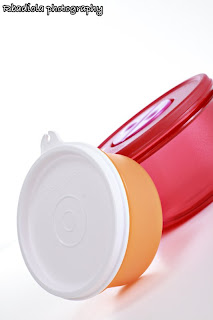
Ever wonder how they do a really washed out background? Like those shots you see in magazines and product shots?
The secret to that is using a white seamless background...and lights!
Usually, photographers point a light into the white background to overexpose it. If you want a more even light on the sides, you can use one light per side. Point them at a 45 degree angle into the background. Be careful though because you don't want to use a lot more light than you need to, if you do, light will bounce off the background and into your lens, which will result in washed out colors. Also pull your subject away from the background as far as you can to avoid the background light from bouncing to your subject.
Wednesday, November 24, 2010
Fall is here
Today we went to the botanic gardens. Fall is here and you can feel it in the cold air.
They had a model train show which was awesome to take pictures at. I had my 70-200 IS and my 18-50 lenses. They also had a gingerbread house gallery filled with gingerbread houses that all look different.
Models are always fun to photograph. Just make sure you are far enough from them when you're using flash to avoid overexposure.
Wednesday, November 10, 2010
Colored backgrounds
Another way of giving variety to your shots is by using different colored backgrounds. I use it all the time and I love them.
For product shots or for something small, you can use pieces of colored paper that you can buy in craft stores, instead of buying those paper backgrounds that cost around 60 bucks a roll at camera shops. If you run out of room for the colored background in your shot, you can always clone that area using photoshop or a similar program.
One useful tip, use a spot light or a snoot to highlight parts of your background so it does not look flat. Also, with colored backgrounds, there is a big chance that your white balance will be thrown off. Make sure you use a grey card, or use your cameras manual white balance setting.
Wednesday, November 3, 2010
To crop or not to crop
The question has always been "to crop or not to crop".
It's pretty simple...crop as much as you want as long as it does not degrade your image.
If you have a camera that is packed with megapixels, cropping shouldn't be a big problem. That's the advantage of having a camera with a big megapixel count. You can crop more to show a particular area more, without much degradation. Although make sure that your main subject is in focus when you crop, or you'll just end up showing a subject that is out of focus more.
Thursday, October 28, 2010
The barn doors
Another very important light modifier I use is called a barn door.
As the name states, it's actually a modifier that attaches to the studio lights and has doors in front of it. You actually adjust the openings of the door to the size you want. It actually keeps the light from spilling into certain parts of your subject, similar to a snoot.
The snoot though is less flexible as it only directs concentrated circular light into your subject. The barn door opening is adjustable to however you want it. You can also attach honeycombs and gels into your barn doors for special purposes.
Here are some of my shots where I used my barn doors:
Sunday, October 17, 2010
Natural lighting for natural looks
I was kinda tired of using flashes for today so I decided to go for a more natural look.
Using only...what else? Natural lighting of course!
I was looking for that shallow depth of field/not so harsh light look so I decided to place my subjects near the window to capture natural light coming in. Of course, natural light coming in is not as harsh as a strobe light and not as powerful so I can set my aperture wider for that out of focus background look.
I had good results in doing this. Also, I didn't have to spend time setting up my lights, which saved me a lot of time.
Wednesday, October 13, 2010
Using a snoot for your shots
One very important light modifier used by photographers is the snoot.
A snoot is basically a cone placed in front of the flash to direct light into a concentrated area. Some snoots have honeycombs that basically softens the edges of the light so you get a softer light falloff. You can also put colored gels in front of them too.
I use the snoot to create highlights on areas of my background so it doesn't look so plain.
I have one of those really cheap ones that you can buy online made of aluminum. With these you have to be very careful especially when using your modeling lights as these can get really hot, hot enough to melt the plastic parts of your studio lights. You can actually turn the modeling lights on to aim the snoot, then turn them off when you're ready.
I've also seen a lot of do it yourself snoots online made of cardboard or plastic. There really isn't much to them, they are just cones, so if you can make one then go ahead.
Friday, October 8, 2010
Colored gels for background colors
A really cheap way to have colored backgrounds without spending a wad of money for colored backdrops is to gel your background lights.
These gels are actually sheets of colored acetate, or whatever it's called, and they go in front of your flash. Mine are the ones that come with the holders for my flash. Other ones can be just the piece of plastic that are either taped or attached by velcro in the flash.
They can also color correct the flash in certain situations. Some photographers put green gels in their flashes when they shoot in flourescent lighting. As flourescent lights give out a green tint.
I mainly use the gels for effects or background colors.
Sunday, October 3, 2010
Band photo shoot on my birthday celebration!
We needed a band shot for our cd so my band decided to come over for drinks, and of course...the band shot!
So we went to my mini studio and took some shots. We are a crossover/thrash band so we decided to go with the dark/dramatic shot that most metal bands long for.
For this shot I put 2 lights on each side at 45 degrees. The main light on the right side and a fill light on the left to make the lighting a bit dramatic. Since this is a group shot, I opted for a wide focal length and a narrower aperture. F11 to be exact.
Post processed in Photoshop to tone down the colors a bit for that dark/dramatic look.
Monday, September 27, 2010
Backlighting a subject
I was thinking of new ways to light up my subject today. I didn't really feel doing the usual 3-4 light setup for the studio so I opted for something different.
A one light setup is a good idea. And to make it more interesting, I decided to go with backlighting...with a colored gel.
I wanted to mimic a sunset look so a yellow gel for the light is perfect.
Gels are perfect for coloring backgrounds. They can also be used to cast colors on the subject. It depends on how you want the color to be.
For this shot I used 1 light, gelled with yellow coming from the back of the subject.
Since I am only using 1 light, I can open up my aperture more, f4 to be exact, for a dramatic focus effect.
Thursday, September 23, 2010
Spade the lovable cat
Today I had nothing to do so I decide to take a picture of our cat Spade.
I was looking for a halloween theme shot and what better subject to take pictures of...a black cat!
So I put out my guitar coffin case opened it up in my studio and waited till Spade came up. He was kinda scared of it first so I decided to sprinkle catnip in it. And of course it works. After making him feel comfortable I took the shot.
I opted for a shallow depth of field so I went for an f6.3 aperture so the background would be out of focus a bit. F6.3 isn't really that shallow of an aperture but it worked for my shot. I used my 50mm 1.8 lens for this.
Sunday, September 5, 2010
BMX and skate competition and the AI servo mode
Today I was at Plymouth Indiana for the blueberry festival. A ton of things were going on in the fairgrounds like arm wrestling, cheer competitions, craft fairs etc. Though the thing that captured my attention was the BMX/skateboarding competitions.
Too bad I cannot actually get inside the ramp area, but I have my trusty 70-200 2.8 IS lens with me! I can stay outside the fence and take shots from there. The 70-200 is perfect for tracking high speed subjects. I set up my speed at 320th/sec and my focus to AI servo. This mode would let the camera track the high speed subject without locking into a particular focus point. This gives you the flexibility to track fast moving subjects without the delay if ever the camera locks on a focus point. Set your camera to burst mode for better results.
Shooting behind the fence isn't bad at all. The wires are so close to the lens that they will almost not appear in the picture because it'll be out of focus. As long as a light source is not hitting the fence, it'll not be so obvious in the shot.
For the complete series, please visit:
http://www.pbase.com/hardcoreboy/plymouth_indiana_skateboardbmx_competition
Labels:
70-200 IS,
ai servo,
bmx,
high speed,
skateboard
Friday, September 3, 2010
Lightning!
Today was really stormy out. Good thing about it is the lightning!
I have been wanting to shoot lightning for a long time and nows my chance.
I setup a tripod and my camera in our garage. Popped in my 18-50 lens, and my wireless shutter release.
I set my shutter speed to bulb so I can control how long my exposures would be, and my aperture to f8. Since I can keep my shutter open as long as I can, I put my ISO to 100. That'll keep the image from over exposing when I keep my shutter open for like 4 seconds or more.
Lightning actually leaves an afterimage after it flashes. If you keep you shutter open for a couple of seconds after lightning flashes you would be able to capture it perfectly.
Since you don't know where lightning would strike, I would suggest using a wider lens so you'd have wider coverage for your shot.
Monday, August 30, 2010
Wireless triggers for external flashes
Couple of days ago I bought a Yong nuo rf 602 wireless trigger for external flashes.
I was kinda skeptical about Chinese made triggers but for 30 USD you can't go wrong with this one.
I had a cheapo trigger that I was using years ago. It was like 15 bucks from ebay. Worked like a charm the first few weeks until I replaced the batteries. After that it was basically failing after 2 shots or so.
I then bought a Microsync from Tamrac
It worked perfectly for the higher end flashes. I was so fond of it I even brought it to our work. I tried it on our Calumet lights at work and it never failed me...not even once.
I then tried it on some of my cheap Chinese made lights...that is when I realized that the Microscync does not really work on them that good. It really didn't work at all! I was using those cheap sl-150's. My 15 dollar trigger works on them like a charm...but not the Microsync.
I really didn't care at all, till I was planning to buy a secondary receiver. The receivers were around 80-100 bucks online. Pretty expensive so I opted for a cheaper more reliable alternative. I didn't wanna spend 400 bucks on a set of pocket wizards so I browsed online and I found the Yong nuo rf 602.
The first time I opened the box, I was very impressed. Build quality was far from the usual disposable builds of other Chinese made triggers. It was pretty nice. The buttons were snappy the battery compartment was decent and the receiver can also be used for speedlites. So I put it on my Sigma flash and it works! It even wakes the flash when it's in sleep mode. The transmitter sits on the camera body nicely. The best thing about it was that it even works on any external flashes, even the cheap ones!
So I decided to put it in my Sigma flash, put the flash on a stand and go out to shoot! It was night time so it was pretty dark outside. I took a shoot of this spider and my flash worked perfectly!
So the Microsync goes to ebay so I can buy a secondary receiver for my rf 602.
Saturday, August 28, 2010
High speed close ups
Couple of night ago, I wanted to try out a high speed close up shots.
I had an idea in my head to take a shot of a matchstick igniting. That'll be pretty interesting!
Things that I needed were:
Tripod
70mm macro lens
Shutter release, wireless or not
A stand for the match
Matches
of course my camera
So I put a single matchstick into a stand so I can focus on it without moving. The camera is in a tripod too so it can be as steady as I want it to be. I put in my shutter release so I don't move my camera when I take the shot. Focused on the matchstick as close as I can then turned the lights off. I setup my camera to the narrowest aperture that I can get without making the shot underexposed, for this I had it at f8. ISO at 100 and speed at 500/sec.
The flame from the match is enough to be your main light, so no external lighting sources needed further for this. So I got another match to light it up, shutter release in my other hand, and BOOM! I take the shot.
When you are attempting this shot, make sure that the actual flame is far enough not to touch your lens! If it does, you might have to invest in a new one.
Friday, August 20, 2010
Love the macro
Still having fun with my macro lens. Took it out for a spin at the botanic gardens and got some awesome shots off of it. Though for really close up shots you have to use a tripod as for close ups, the slightest movement will throw you out of focus, as these macro lenses have very shallow depth of field even if you are using a narrow aperture in close ups. Here's a shot from that trip:
You can still see the hair from the moths back.
Here's another one with a spider:
You can still see the hair from the moths back.
Here's another one with a spider:
Wednesday, August 18, 2010
Still having fun with my macro lens
Took out me macro lens for a spin today...in our bathroom!
I setup my crappy old speedlite on a stand and took a picture of a water droplet from our tub.
Though my speedlite doesn't have high speed sync, I had to just use natural lighting coming from our bathroom lights.
Of course I had to increase my ISO to 1000, so I can get that 500th of a second shutter speed.
I really turned out ok.
Although the shot came out to be kinda noisy.
Saturday, August 14, 2010
New eyes...new lens...HA!!!
Today I received an early birthday present from my girlfriend. I've been wanting one for a loooong time now and it's finally here.
It's a Sigma 70mm ex macro lens. I have never owned one, and for the photography I do, I was wondering why I didn't get one before. Now I can't wait to try this baby for flowers and bugs, but for now I took it for some test shots with my girlfriends baking stuff.
My first impression when I first held it was it's a bit heavy for it's size. Doesn't really matter because it really cannot compare to a 70-200 is usm lens which I carried around for a hiking trip the last couple of months...I mean if I can carry that beast for hours I really can't complain about this one. Build quality is good. Same as what you can expect from an EX grade Sigma lens which is their top of the line. I love that matte finish. Some people don't really like it because it scratches very easily. I couldn't care less. I snapped it onto my Rebel and took my first few shots. I tried shooting with autofocus on.
Now this is the downside to this lens. The motor sounded like Robocop trying to get his gun from his holster. It is LOUD...and I thought the motor on the 50mm 1.8 Canon was loud, this one takes the first place for that! The focus is also slow, and hunts in low light. That is why it has a limiter switch on the side to limit the travel time when it's focusing. with the limiter on, it still is pretty slow. Though I've read that slow focus is typical on macro lenses except for the ultrasonic motor ones. I really didn't care either because I am using this lens on manual focus. Auto focus on macro photography isn't fun at all.
Here is where it gets good. The lens is SHARP. As I have read on one review site, one guy says be careful not to cut yourself. I suppose macro lenses are supposed to be sharp but this one is crazy sharp. Here's a sample of a battery taken about 4 inches away:
Of course, compressing these images to be jpegs for the web does not give it justice. But the original was 10 time sharper than this.
Now 70mm is kind of a weird range for a macro lens. Sigma was pretty smart in doing this as this lens can be used on a full frame sensor and a crop body. Used in a full frame it is a real 70mm lens. Used on a crop body, this becomes a 112mm which is just perfect for macro. In my opinion, 50mm is too short and a 100mm used on a crop body is too long. I have a small studio so I went for a shorter lens.
I am really glad I got this lens. Kudos to my girlfriend.
Here are some shots of my girlfriends cupcakes:
I am back...
Monday, August 2, 2010
Got my eyes fixed
I've been on break for a couple of days now. Just got laser surgery for my eyes. Still feeling the sting of the operation but everything else is good though.
It'll take a couple of days to heal and a couple of weeks to completely restore my eyesight to 100%. For now I'm just taking it easy.
Monday, July 12, 2010
Buying lenses...the difference between OEM and 3rd party
This has always been a never ending discussion. People have always asked the question about which one is better. In my opinion, it's always up to you which suits you best. It all depends on your budget, the lens application, warranty, etc.
3rd party lens makers have come a long way in making their lenses very good or equal to oem lenses. Of course, purists will always say the oem lenses are better, that's their opinion. Oem lenses are better in some ways, not all.
I have seen professional photographers use 3rd party lenses all the time. Some say 3rd party lenses are for amateurs only, which will bring us to the discussion, what is a definition of a pro photographer? I'd like to discuss that right now but we will be off topic. But I will discuss about that in the future. For now let's just concentrate on the topic alone.
I use Canon cameras and there are 3rd party lens manufacturers that make lenses for Canon. Two of the most popular ones are Tamron and Sigma.
I currently own a Sigma 18-50 Ex 2.8 lens.
So far I love this lens for it's quality. Build and image quality all in all. It's not perfect but for how I use it, I can say that I cannot go on a shoot without this in my bag. The Sigma Ex line is supposed to be their premium lens line. Equivalent to the Canon L series lenses. Of course a lot of people would disagree that they are totally equal. I could have bought an L lens equivalent, or close...but I just don't have a thousand dollars to spend on a short zoom. It works good for me, so I can say I spent money on this one wisely. Before this lens, I used a Sigma 18-50 HSM OS lens, not bad at all but the sharpness on the corners wasn't really that good on that lens. To think, it's almost half the price of the EX version. So basically, the phrase "what you pay for is what you get" is applicable in this situation.
I used to own a Sigma 28-105 2.8-4 lens.
This was actually the first lens I bought after the kit lens that came with my Rebel XT. Quality wasn't bad at all with this one. I have used it for years till I realized I needed a better quality zoom. I sold this online and got almost the same price when I bought it brand new. Not bad for a lens that is like 5 years old.
I recently bought a Canon 70-200 2.8 IS lens and I love it. I was waiting for the Sigma 70-200 2.8 OS HSM to come out in May, but it really didn't happen. So I opted to go with the Canon so I wouldn't miss the early months of summer without a telephoto. So far I cannot put my 70-200 down. I cannot even take my hands off of it. So why did I go for the Canon instead of the Sigma in this case? For more than a thousand dollars, I'd prefer a lens that is calibrated right and built like a tank. That would save me time from sending the lens back to the manufacturer for recalibration.
3rd party lenses are good alternatives to the oem ones without breaking the bank. Quality control is an issue though when buying them. You buy a 3rd party lens and maybe you get a good copy of it, or maybe not. Though the warranty for third party lenses are superior to the oem ones. Performance also differs between the oem and the third party ones, although the high end third party lenses may be equal or close to the oem ones. All in all, it all depends on you. Do some research, see what is good and what is bad about the lens you are planning to buy. Go for whatever works and whatever makes you happy.
Sunday, July 11, 2010
Back from the 4th of July celebration
Just came back from a vacation in Eagle River Wisconsin. Have a ton...and I mean a TON of photos to process. Usually I shoot Raw instead of Jpegs and the size of each file is so much different. So it takes me a while to upload them in my mac if they are in Raw format. Although I already processed some of the fireworks shots that I took.
These were all shot using a remote shutter release, with my camera mounted on a tripod. one very good tip on shooting fireworks is to use the bulb shutter option in your camera and use a remote shutter with it. Use MANUAL focus instead of auto. Question is, how do you use manual focus if your subject is moving? The trick is to look at where the fireworks are coming from and where they usually explode in the sky. Focus on where the majority of them blow up in the sky and then manually focus on that area. Use a narrow aperture starting from f8 onward...it all depends on what you prefer, but using a narrower aperture gives you more depth of field so the focusing doesn't have to be exact at all. With a narrow aperture you will have an easy time to manually focus without worrying too much if your focus is spot on. If you are using a shorter lens, you can actually focus to infinity and basically all the distant object would be in focus. I used a telephoto with my shots but was still able to focus right without being in the infinity area. You can easily do this by focusing on the very first few fireworks that blow up in the sky. After focusing, the sky is all yours.
The whole set can be found at:
http://www.pbase.com/hardcoreboy/4th_of_july_2010_fireworks
Subscribe to:
Posts (Atom)